
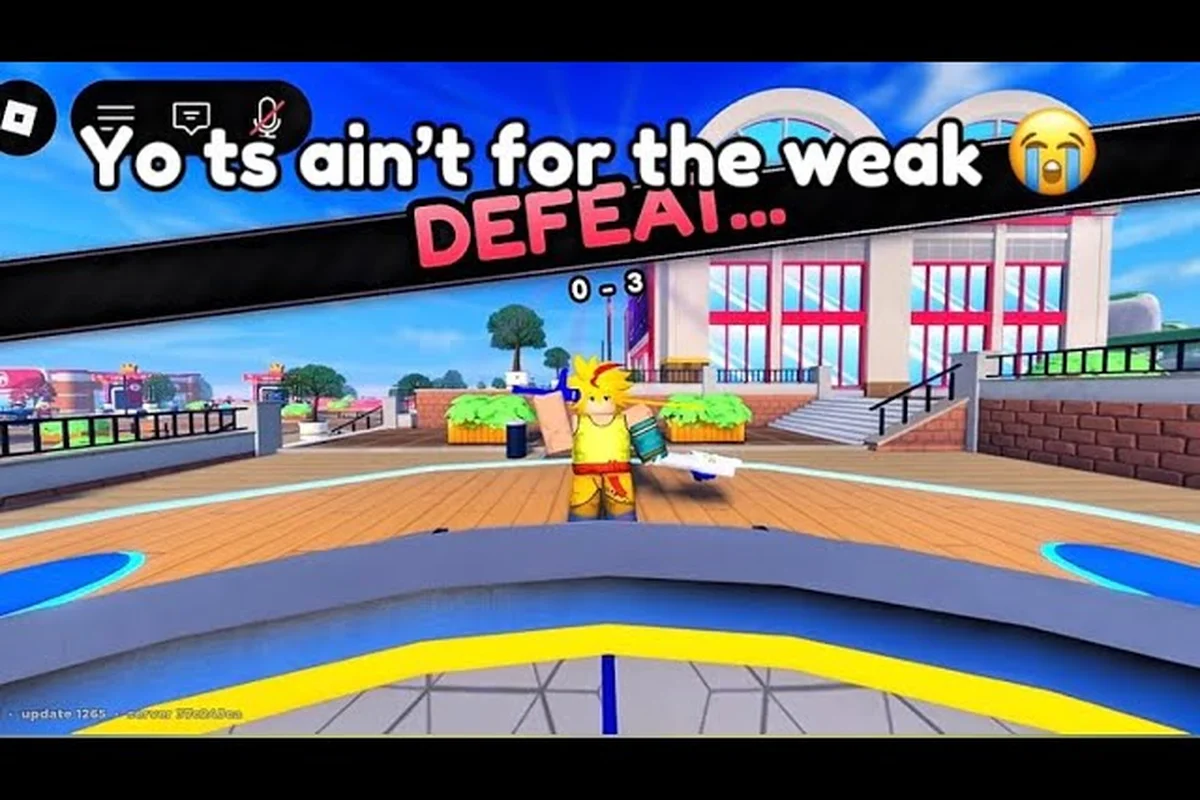
The split-second decision you make when you release your Bey decides the entire clash, which is why bey rivals launch timing is the single most underrated skill in the game. Get it right and you control the stamina race before your opponent even settles into the arena.
What Launch Timing Actually Controls
Every battle in Bey Rivals is a burst-style spinning-top clash where both Beys spin in the arena and the last one still spinning wins. A ring-out or a burst-pop ends the round instantly. That means the opening seconds are not a formality — they set the tempo for everything that follows, and the launch is where that tempo is decided.
When you release your Bey, two variables matter: spin strength and launch angle. Spin strength determines how much rotational energy your Bey carries into the arena. Launch angle determines where that energy gets spent — into the center, into a wall, or into your opponent's contact point. Community guides consistently advise reading the opponent's Bey type at the blader screen and adjusting both values before you commit.
The reason this matters so much is physics. A Bey that enters the arena with high spin strength but a bad angle bleeds stamina into the arena walls within the first few seconds. A Bey with a clean angle but weak spin strength loses the early contact exchange and gets pushed toward the ring-out zone. You need both, and you need them matched to your opponent.
-
Spin strength — how much rotational energy you bring in; higher values favor Stamina and Defense builds that want to outlast.
-
Launch angle — where that energy goes; flatter angles drive forward into contact, steeper angles hold center.
-
Release timing — the moment you let go relative to the countdown; early releases drift, late releases under-spin.
-
Opponent read — the Bey type shown at the blader screen tells you which of the three above to prioritize.
If you are still learning how the arena itself behaves, the battles explained walkthrough covers burst rules, ring-out zones, and how a round actually ends, which makes the timing decisions below much easier to visualize.
How the Opening Two Seconds Set the Round
Most rounds are effectively decided before either Bey reaches full contact speed. A Bey that launches with clean center control and strong spin holds the middle of the arena, and the middle is where stamina drains slowest. A Bey that gets pushed off-center early spends the rest of the round fighting the arena instead of the opponent.
According to community data, players who consistently win ranked ladders tend to launch with moderate spin strength and a flat, center-seeking angle rather than maxing spin strength every time. The reason is simple: max spin strength is only useful if the angle keeps that energy in play. Otherwise you have paid for energy you immediately waste.
Spin Strength: The Real Trade-Off
Spin strength is not a "more is better" stat, and treating it that way is the most common mistake new bladers make. The correct value depends entirely on your Bey type and the matchup in front of you. Over-spinning an Attack Bey, for example, trades away the burst window you need to punish a Defense or Stamina build, while under-spinning a Defense Bey leaves it unable to absorb a flat, forward-driving charge. Spin strength also interacts directly with launch timing: a high-spin launch needs a longer wind-up, so mistiming it against a faster opponent hands them the first exchange before your Bey has stabilized.
| Bey Type | Recommended Spin Strength | Launch Angle | Primary Goal |
|---|---|---|---|
| Attack | High | Flat, forward-driving | Burst or ring-out in the first exchange |
| Defense | Medium-high | Slightly steep, center-holding | Absorb the charge and stay planted |
| Stamina | Medium | Steep, dead center | Outlast and win the stamina race |
| Balance | Medium | Neutral, adaptive | Read the opponent and shift mid-round |
The table above reflects the confirmed Attack / Defense / Stamina / Balance framework that the game uses for part types. Surnames and traits add throw-type modifiers and stat buffs on top of that base, so two Attack Beys can still want different spin strength values depending on their trait rolls.
Reading Spin Strength in the First Exchange
You can tell within a second or two whether your spin strength was correct. If your Bey immediately drifts toward the arena edge after contact, you either over-spun or launched at too flat an angle. If your Bey stalls out and stops responding to contact, you under-spun and gave away the tempo.
Experienced players treat the first contact as a diagnostic, not a commitment. If the launch was slightly off, they adjust the next round rather than trying to force a comeback through the same bad setup. That habit alone separates players who climb the ranked ladder from players who plateau.
Counter Attacks and Counter Picks
Counter attacks are where launch timing stops being a solo skill and becomes a read on your opponent. When an attack-type Bey charges, a well-timed counter-launch or a defensive driver can flip the exchange entirely — the charging Bey commits its energy forward, and a Bey that holds center can let that energy spend itself against a wall or a defensive contact point.
The window is narrow because the launch input locks in before the countdown resolves, so your counter-launch must be dialed in during the blader screen — not after the charge animation begins. Read three things there: your opponent's Bey type, their spin direction, and their driver's burst profile. An Attack-type running a rubber flat driver telegraphs an aggressive first-second rush, which means a Defense pick with a medium-high spin and steep angle should already be queued before the round even loads. Miss that pre-load and you are reacting to a charge you cannot out-time; hit it and your opponent's entire launch plan collapses on contact.
| Opponent Bey Type | Your Counter Pick | Launch Adjustment | Why It Works |
|---|---|---|---|
| Attack | Defense | Medium-high spin, steep angle | Absorbs the charge without giving up center |
| Defense | Stamina | Medium spin, dead-center angle | Avoids the contact war entirely and outlasts |
| Stamina | Attack | High spin, flat angle | Forces early contact before they settle |
| Balance | Balance | Neutral spin, adaptive angle | Mirrors their flexibility and wins on execution |
This is the core of any working matchup guide: you are not picking the strongest Bey, you are picking the Bey that makes your opponent's launch plan fail. A Defense Bey that expects to absorb a charge is wasted against a Stamina Bey that never charges.
Building a Counter Pick Without Guessing
Counter picks only work if your parts actually support the plan. A Defense strategy needs defensive parts with the right stats, and those come from the part-rolling economy rather than from simply wanting them. The parts and upgrade guide explains how drops, crafting, and part rarities feed into a loadout, which matters because a counter pick you cannot build is not a counter pick at all.
Once you have the parts, the routine is straightforward: check the opponent's Bey type, select the counter, set spin strength and angle to the values in the table above, and launch with a clean center-seeking release. Repeat the read every round, because opponents swap loadouts between rounds more often than new players expect.
A Practical Launch Routine You Can Repeat
Timing improves fastest when you turn it into a fixed routine instead of a feeling. The steps below are the sequence experienced bladers run through before every launch, and they work in PvP duels, NPC challenges, and boss fights because all three modes use the same core physics.
-
Step 1 — Read the blader screen. Identify the opponent's Bey type before you touch your launch controls.
-
Step 2 — Pick the counter. Match your Bey type against the table above and commit to the plan.
-
Step 3 — Set spin strength. Use the recommended value for your type, then nudge it up or down based on the opponent's likely angle.
-
Step 4 — Set launch angle. Flat for aggression, steep for center control, neutral for Balance mirrors.
-
Step 5 — Release clean. A steady release beats a fast one; drifting releases waste the spin strength you just tuned.
-
Step 6 — Diagnose the first contact. If the Bey drifts or stalls, note which variable was wrong and fix it next round.
Practicing this routine in NPC challenges is the cheapest way to build the habit, because NPC opponents are predictable enough that you can isolate one variable at a time. Arena practice transfers directly to ranked climbs since the physics are identical across modes.
Common Launch Mistakes to Stop Making
Three mistakes show up in almost every replay of a lost round. Maxing spin strength on every Bey type is the first — it only helps Attack builds that can convert the energy into contact. Ignoring the launch angle is the second, and it is the reason so many players lose rounds they should have won on paper. The third is refusing to adjust between rounds, which turns a single bad read into a losing streak.
Fixing all three is mostly a matter of slowing down. You have the full countdown to set two values and read one screen, and that is enough time once the routine is automatic. The routine itself is simple: on the "3" beat, lock your spin strength — a Stamina type wants a light pull near the bottom of the meter, while an Attack type can push toward the top for the contact damage it needs. On "2," check your launch angle against your opponent's predicted movement; a flat, forward angle keeps you centered for a counter attack, while a steep angle risks a self-out. By "1," your thumb should already be off the meter so the actual launch is pure reaction, not a decision. Players who drill this three-beat cadence report far fewer mis-timed launches than those who improvise each round.
Matchup Guide: Putting Timing and Counters Together
A matchup guide is only useful if it changes what you actually do at launch. Below is how the three most common matchup shapes play out when timing is handled correctly, based on the confirmed type framework and community-reported tendencies.
| Matchup Shape | Launch Priority | Round Plan | Failure Mode |
|---|---|---|---|
| Attack vs Defense | Medium-high spin, steep angle | Absorb the charge, hold center, outlast | Over-spinning and drifting into the ring-out zone |
| Stamina vs Attack | High spin, flat angle | Force early contact before the opponent settles | Under-spinning and losing the first exchange |
| Defense vs Stamina | Medium spin, dead-center angle | Avoid contact wars, win the stamina race | Chasing contact and burning stamina for nothing |
The pattern across all three is the same: your launch should make your opponent's plan harder to execute. Attack wants contact, so Defense denies it. Stamina wants a long round, so Attack shortens it. Defense wants to absorb, so Stamina refuses to hit.
Because the game launched in the October 2026 window and receives frequent balance patches, effective combos shift with each update. Ring-out and burst fixes around launch have already changed which angles are safe, so treat any specific angle value as a starting point and re-test it after a patch rather than assuming last month's numbers still hold.
When to Break Your Own Rules
There is one situation where the routine should be abandoned: when your opponent has clearly read you first. If they have countered your last two launches, switching Bey type mid-set is better than losing a third round to the same read. Keep one alternate loadout ready for exactly this, and treat the swap itself as a launch-timing decision, since a fresh Bey type changes what spin strength and angle are correct.
Frequently Asked Questions
What is the most important part of bey rivals launch timing?
Spin strength and launch angle matter equally, because spin strength without a clean angle wastes energy into the arena walls while a clean angle with weak spin strength loses the first contact exchange. Set both values based on your Bey type and the opponent shown at the blader screen.
How does spin strength affect the stamina race?
Higher spin strength gives your Bey more rotational energy to spend over the round, but only if the launch angle keeps that energy in the center of the arena. Stamina and Defense builds benefit most from medium-to-high spin strength paired with a steep, center-holding angle.
When should I use a counter attack instead of a direct charge?
Counter attacks work best when your opponent is running an Attack build that commits energy forward. A defensive driver or a well-timed counter-launch lets that charge spend itself against a wall or contact point, flipping the exchange without you having to win a direct power contest.
How do I choose counter picks before a match?
Read the opponent's Bey type at the blader screen and pick the type that makes their launch plan fail: Defense against Attack, Stamina against Defense, Attack against Stamina. Then confirm your parts actually support that plan before committing to the round.
Do launch timing rules change after balance patches?
Yes. Bey Rivals launched in October 2026 and receives frequent balance patches, including ring-out and burst fixes that change which angles are safe. Re-test your preferred spin strength and angle values after each major update instead of assuming older numbers still apply.
Mastering bey rivals launch timing comes down to treating the launch as a decision rather than a reflex. Read the opponent, set spin strength and angle to match your Bey type, commit to a counter pick that breaks their plan, and diagnose the first contact so the next round is sharper. Do that consistently and the stamina race stops being a coin flip.